
Docker Nginx Certbot
Serving a home website via Nginx and Certbot using Docker
Part of the reason I bought my Raspberry Pi was to use it to host my website. This is in case I need to make API requests or to use it for very simple things. I wrote my website using Django, PostgreSQL, Nginx and Certbot. At least these are the components in my docker compose file. It was pretty challenging to string all these together and to get them to play nicely together. I also couldn’t find a guide for doing all this on Raspberry Pi. So I’m writing my own here. Best part about this is that it’s completely free and doesn’t rely on any external services (e.g. AWS, No-IP, etc.).
How does this work?
Network
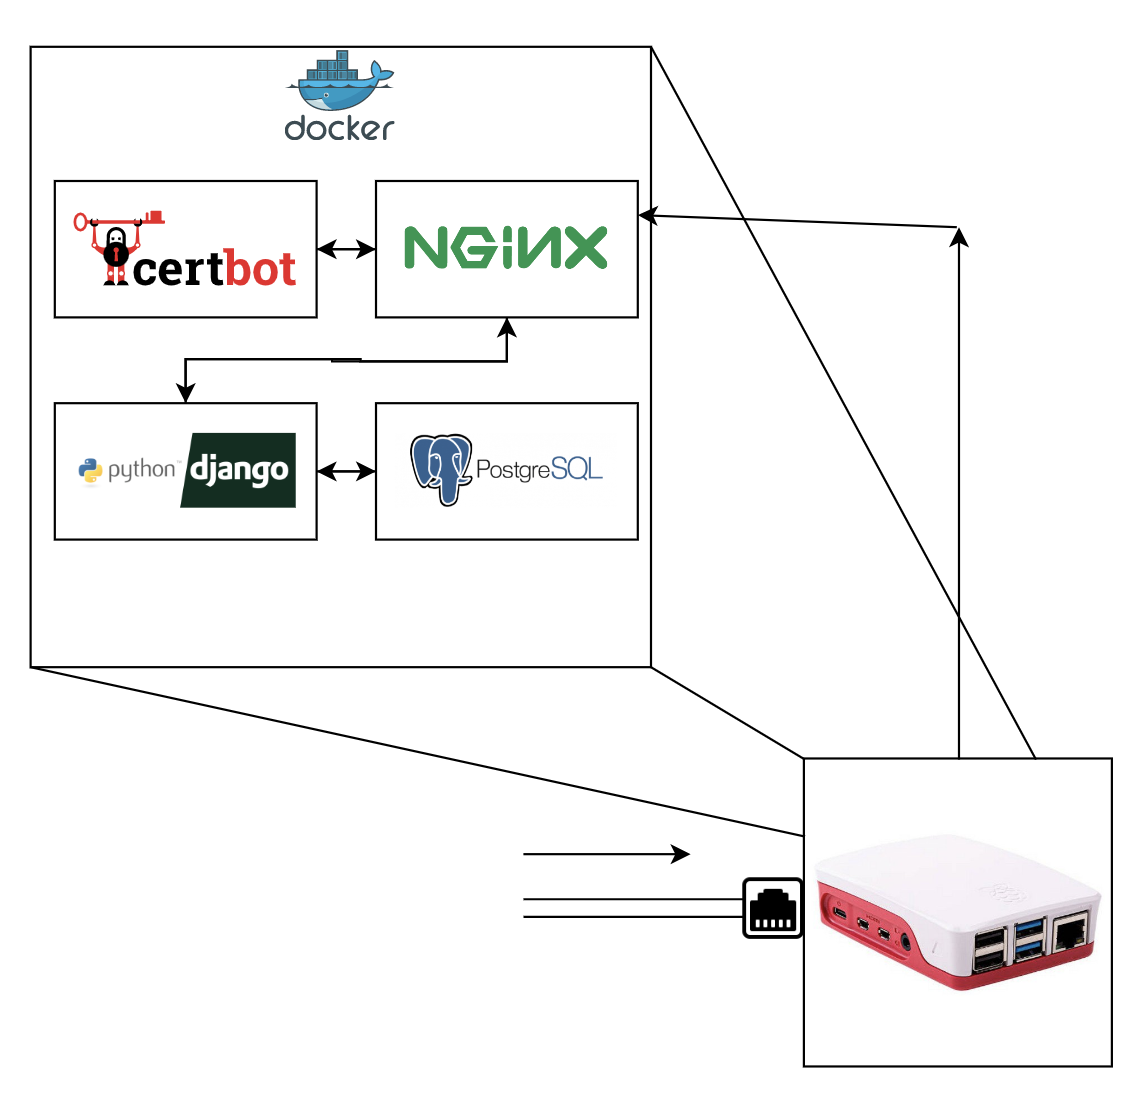
When I started on this I didn’t really know all that much about what I was doing. These were just technologies that I’d heard thrown around and used once or twice if at all. Here is a diagram of the networking piece:
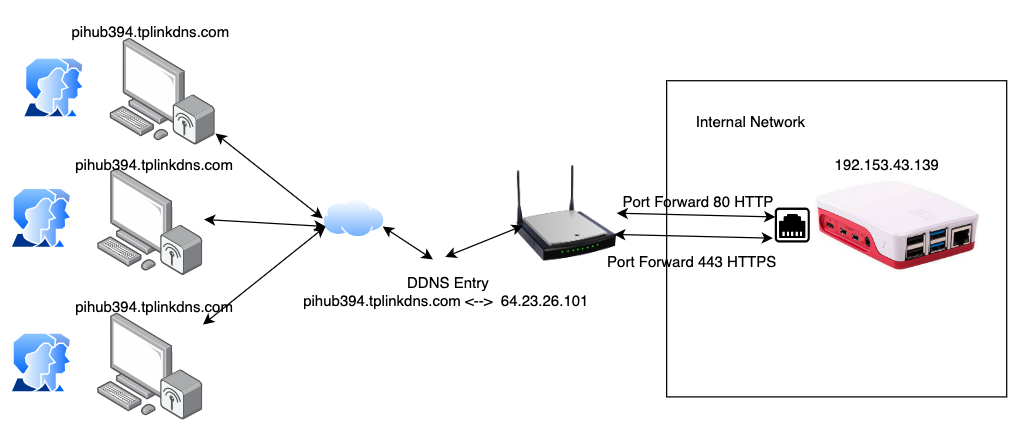
There are a few important concepts to understand here:
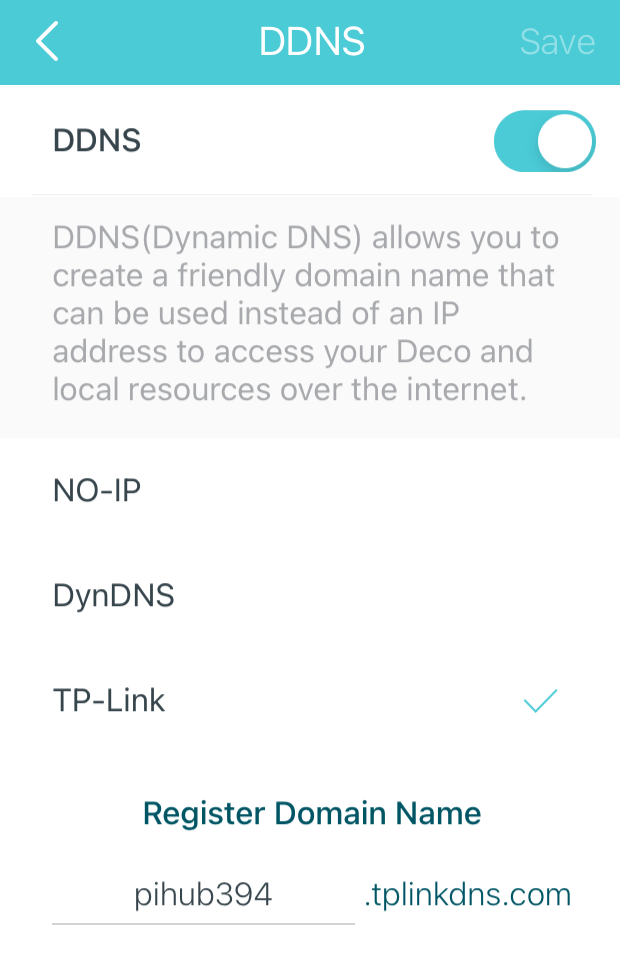
- DDNS - Dynamic Domain Name System - This basically is a service that route a domain name to an IP address, even when that IP address dynamically changes. So in my case I have a DDNS set up that routes the domain pihub394.tplinkdns.com to my public IP address. You need this because most internet service providers (ISPs) will constantly change your home’s IP address (a dynamic IP). So if a user halfway across the world wants to access your IP address they wouldn’t have a way to get it, that’s where the DDNS comes in, it translates a consistent domain name (pihub394.tplinkdns.com) to your current IP.
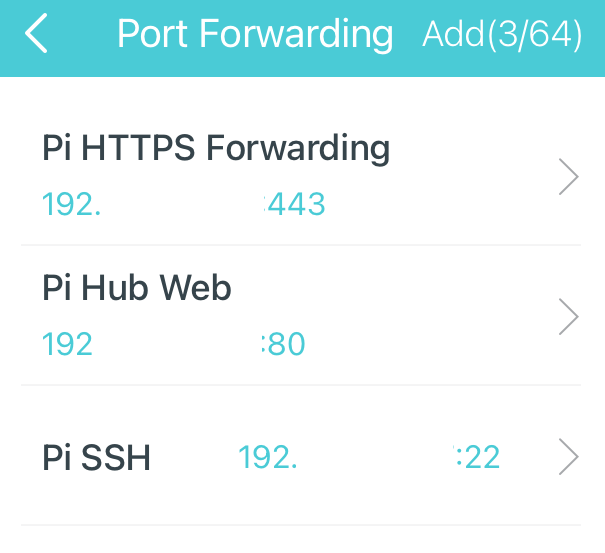
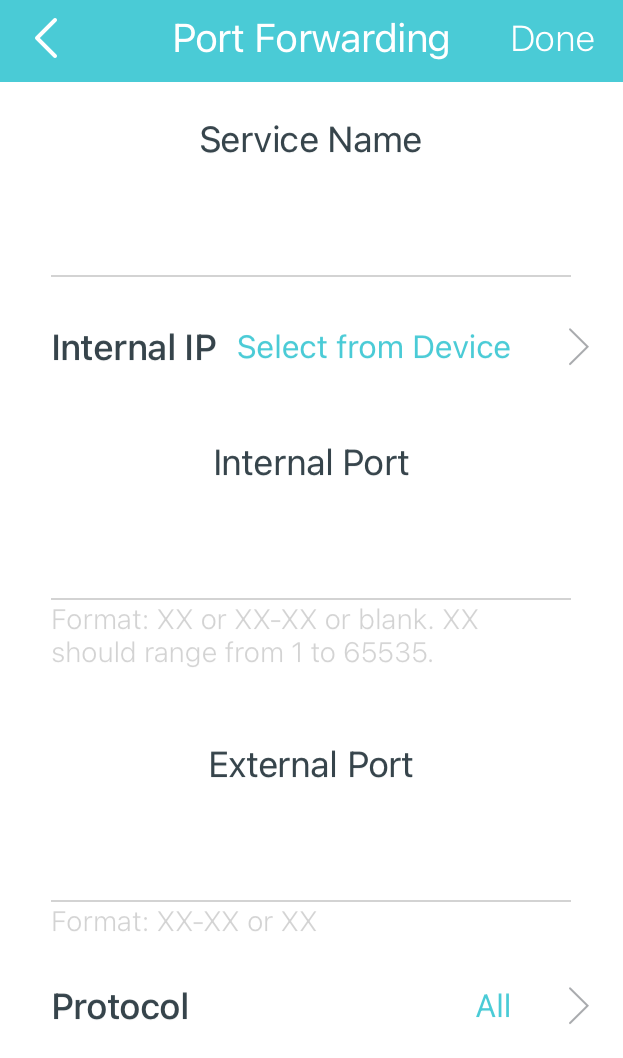
- Port Forwarding - Port forwarding basically tells your router: if you receive an incoming request on port XX please forward that port to some internal IP (device) on port YY. HTTP traffic is served over port 80 and HTTPS is served over port 443, so both of those need to be forwarded from the router to the Raspberry Pi.
- Static IP for Raspberry Pi Device - Last important thing is that you want the Raspberry Pi to have a static internal IP address so we assign it one. I showed how to do this in my ssh tutorial.
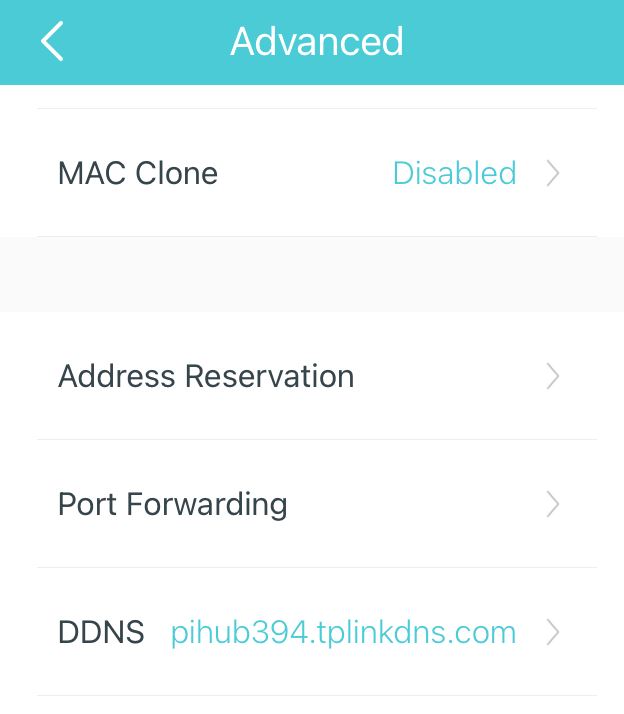
TP Link
Fortunately I was able to set all this up using my mesh Wifi service (Deco by TP Link). It provides a really easy interface to set these services up (for free!).
https://www.tp-link.com/us/deco-mesh-wifi/
Here’s the screenshots for how to set up each:
How does this work? … Continued
Beyond the networking configuration, of course we need to configure the software on the Raspberry Pi to process requests. I decided to use Docker / Docker Compose for this. Docker containers enable you to create applications that are independent of each other in terms of development and deployment, but can be integrated together via network interfaces. Basically, they’re microservices. The nice thing is that specific software will have their own docker images with that software pre installed. For my stack, here is the list of the services:
We will dive into each of these… To be continued